
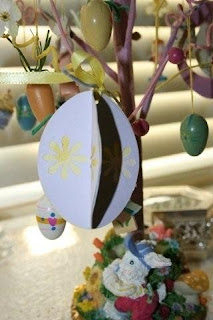


A 3D ornament made from a Jumbo oval punch and patterned paper.
First decide if you want to use three ovals for your ornament or six for a fuller look. Then punch desired number of ovals out of patterned paper Cardstock will also work. An oval template or die cut could also be used for this step.
If you planning to stamp a design on your egg do so before going on to the next step.
Now your ready to fold each oval egg in have vertically. If you are planning on using a small decortive craft punch you'll want to line up two ovals and punch both ovals at the same time. Be careful to chose a punch that will fit in the area outside of the folded line and avoid going into the folded line with the punch. Next glue the folded sides of the ovals together to form the ornament. Punch a hole in the top and tie a ribbon to complete.
Once you've made a few you may want to try another version with the floating disk inside.
3D Egg Ornament with floating disk tutorial
Step 1: Punch three ovals Step 2: Use a circle punch and punch the middle of each oval being careful to center Step 3: fold the ovals with punch opening in have. Step 4: Punch two circle for the center disk Step 5: Stamp or decorate as desired on both circles. Step 6: Glue both circles together with a loop of ribbon sandwiched between Step 7: Sand the edges of circles to allow it to fit into the opening of the oval Step 8: Glue the three sides of the oval around the "floating" circle with the ribbon loop sticking up from the top. Step 9: Make any adjustments to align edges before the glue sets. Viola! You've just made an egg-stra special egg ornament.









2 comments:
Great project - TFS.
Teresa
I LOVE IT how awesome TFS
Post a Comment